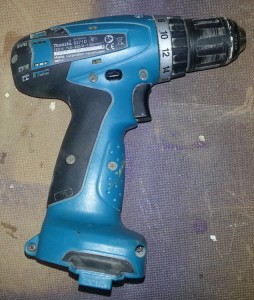
My electric drill decided to start shooting fire and smoke at me the other day so I thought that it was time to take it apart and see what was inside. My experience of taking apart modern tools led me to believe that it was probably going to be a bin job but I was curious to see how it was built and try and diagnose what was wrong. It turned out though that I was actually able to repair it.
Before I really get started I want to point out that this repair will invalidate your warranty if you still have one and it’s not an terribly easy repair to make. The part that I’m fixing is not designed to be fix and only time will tell how long the fix will work for. Having said that with a little patience you can probably breath life back into your drill if you’re having similar issues.
The drill I’m repairing is a Makita 6271D 12V but I’m pretty sure this fix will work for all similar Makita drills and probably for most cordless drills since they are going to all be very similar internally. I bought this drill back in 2008 when we first moved into our current house. I have used and abused it practically non-stop since getting it so it doesn’t owe me anything. Over all I’m really pleased with this drill, it’s proven to be tough and reliable and has a good amount of power in a compact size. If I had to pick one thing that was wrong with it then it would be the chuck. Rather than the common two ring design it uses a single locking ring and relies on the gear system to hold the shaft. A couple of times I’ve tightened it too much and it sounds like it’s jumped a gear internally. I’ve got another couple of drill similar to this but a bit newer and Makita seem to have gone back to the two ring chuck.
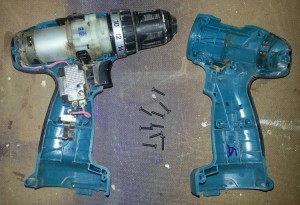
First thing to do is get into the drill which is achieved by removing an impressive nine screws. I was half expecting to find a bunch of plastic clips holding the two halves together but I was very pleased to find that it was just screws.
Considering what I’ve put this drill through I was very surprised to find hardly any dust inside it. There was a little around the trigger area and a bit around the motor intake as you would expect but for the most part it was dust free. One of the jobs I’ve done with this drill is boring holes for pipes and cables through joists. As our house is pretty old you can imagine the dust and dirt that has accumulated under the floor boards – it’s not a nice place to be.
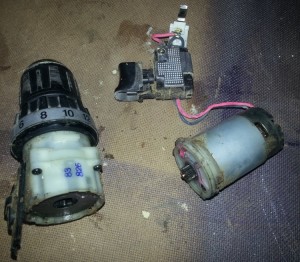
The innards popped out quite easily and the motor and gear box came apart with a simple twist. It was at this point I had my first mishap. The speed selector on top of the gearbox is only very loosely held on and it fell off. The selection position is held by two small springs one of which made a bid for freedom. Fortunately I found it again and managed to re-insert it. The wires are routed around the back of the motor and held in place by some moulding on the case. Take care as you pull the cables out the clips are very tight and could cut the cable sheath.
As this article is already getting a bit long I’ll end it here and continue it in part two.


