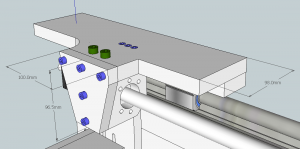
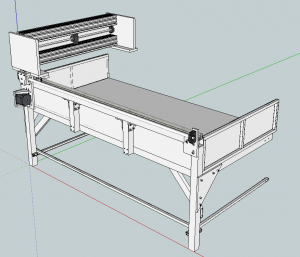
I’ve been doing quite a bit of reading of build logs in the last week and a some tinkering in sketchup to try and improve the design. One of the things that I constantly read people being advised to do is beef up the connection between the gantry and the x-axis ball screw. It’s very tempting to place the ball screw lower so that you protect it from debris and make connection simpler. The problem with this is that the connection to the gantry needs to get stronger and stronger to withstand the forces being applied. It’s worth remembering that the gantry will typically weigh around 20 perhaps even 30 kg and has to be stopped and started quickly.
One of the build logs I read (sorry no reference) had a two plate gantry design which I’ve decided to use here. What that means in English is that there is a plate that attaches to the bearing blocks and then another plate on top which connects the gantry. The idea is that this gives you more flexibility to align the gantry on the bearings.
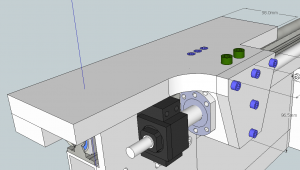
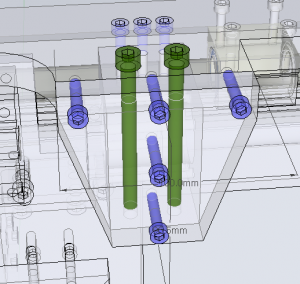
I’ve slightly redesigned the bed to make it simpler to build and to move the legs to be directly under the x-rail. It’s shown bolted together but I’ve decided to weld at least some of the joints so that I get it done this century.In order to achieve a strong connection I’ve gone with a 50mm lump of aluminium machined out so that it’s a snug fit around the ballnut. The green bolts are M8x90 and go most of the way through. The blue bolts are M6x30 and screw in to the block between 15 and 20mm. I’m not keen on the three M6 bolts close together on the top plate but I think they’ve got to stay. They are there to counter any torque applied by the green bolts and face plate if things aren’t 100% square.
Now here’s where I’m going a little off-piste with the gantry I think. There’s a thread over on MyCNCUK that discusses different gantry designs. I liked the L shaped solution made from 45×90 extrusion but I also liked the C shaped designs so I thought why not try and combine the best of both worlds and use some 90×90 heavy extrusion (this is now in the sketchup library if anyone else wants it). I’m guessing this will give me both vertical and horizontal strength and the extra bit of mass should help damp any vibrations a bit.
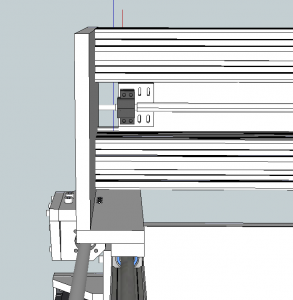
There’s one thing that’s really starting to concern me, cutting all the aluminium to shape. I have a good selection of woodworking tools but not much in the way of metal working tools. I’m seriously considering having a go with my wood router. There’s not much information to be found online about trying this. There’s plenty of people have claimed they’ve done it and I even found a single video on YouTube but no one seems to post good instructions. The best I came up with was this thread where someone is modifying their car. Starting on page 44 he demonstrates routing some 15mm aluminium plate. It seems the key is to have the bit rotating as slowly as possible and take small bites, the slowest my router will go is 10,000rpm which seems to be slower than most so I think I’m in with a shot.I’m currently pondering running the y-rails along the front of the gantry rather than top and bottom as most people do. Although this will cause the Z-axis to stick out about 50mm more than the top and bottom rail design it will also allow me to maximize my y-cutting distance and have a slightly wider y-bearing spacing. The gantry side plate will be braced front and back and reduced in size to only what is required as the design progresses.
I can’t decide whether to table or hand route the aluminium, the problem with table routing it is controlling the depth of cut when using a top following bit. I’m really not keen on the whole rubber washer thing that thread demonstrates but without it you could easily end up taking a cut of a couple of millimeters which would probably go badly.

