In part one I opened the drill and took the innards out. In this article I’ll open the motor and make the repair.
Now that I’ve got the drill apart it’s time to start fixing it. I wasn’t sure what was wrong with the drill and I didn’t think it was fixable so I took off a few bits that probably aren’t necessary to remove as I was interested in seeing how it went together. I’ll give you a quick look at them here just in case you do need to remove them and because I’m sure you want to see what’s inside.
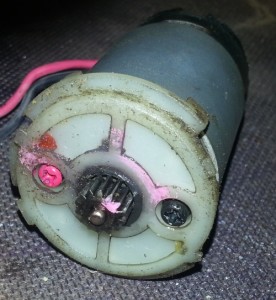
The first things I removed was the motor mounting plate. This couples the motor to the gearbox and it held in place with two screws once of which is marked read. This is important because the positive lead to the motor is longer than the negative and the mounting plate only goes on one way. I managed to put it back on the wrong way around first time, oops. This part probably doesn’t need to be removed.
There is also a sleeve wrapping the motor which I took off, again this doesn’t need to be removed. I’m not sure what the sleeve is for, it could just be a spacer or it might be to enhance the magnetic field. Either way leave it in place as there’s nothing underneath it.
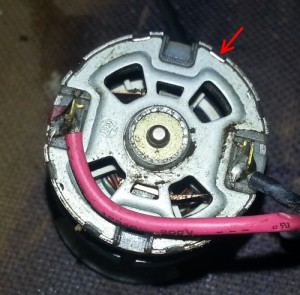
Flip the motor around and you see the power connectors and the clips that hold the back plate in place. I decided to unsolder the power cables but as long as you are careful I don’t think that’s actually necessary. I should point out that I had, by now, guessed that the problem was probably with the brushes rather than the windings on the motor itself. My guess what that the brushes were all but gone and that I was grinding away whatever spring mechanism held the brushes in place.
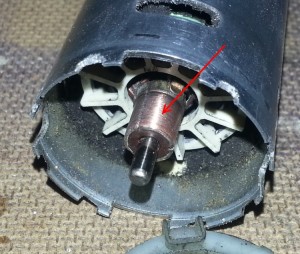
Since I’d not been inside a motor for a while I decided to try and get the can open to confirm my guess. This proved to be a tougher proposition that I expected.
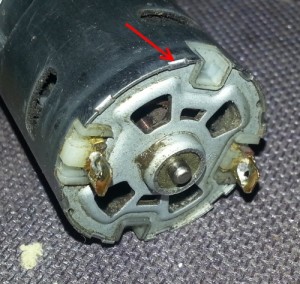
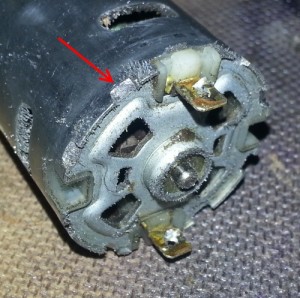
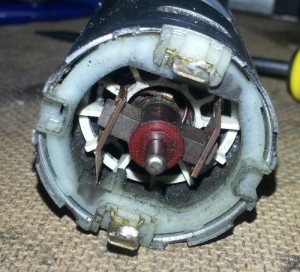
The image on the left highlights one of the eight clips that fix the back plate into place. I thought that it would simply be a case of bending the clip back and pulling the place out. Try as I might I couldn’t get anything in to bend the clip back though. Even a really sharp ended flat head screwdriver couldn’t get any purchase on the tiny bit of bent metal.
In the end I filed off the clips which is less than ideal but it worked well enough. The next job was to get the back plate off. Again this was tricky. The best approach I found was to place the sprocket end of the shaft on the bench and tap gently on the outer case with a hammer. That raised the plate enough that I could get a screwdriver in under it and lift it off completely.
Inside you’ll find two discs that I presume electrically separate the commutator from the case. These can be removed by hand by pulling them up the shaft. Be careful not to lose them as I think it would be game over if you do.
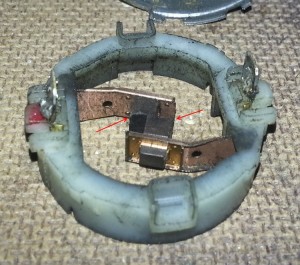
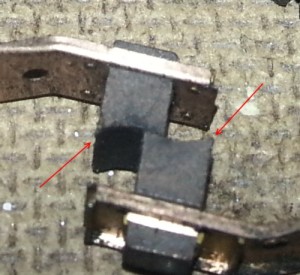
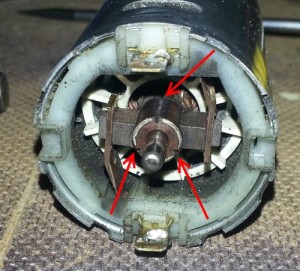
Now carefully pull the inner plastic ring out. The brushes should come out with the ring. To leave you with a piece that looks like the image on the right. Seeing the brushes up close an personal I was surprised how much was still left. Before I pulled this assembly out I spun the motor by hand a couple of times and I noticed that the brushes seemed to be awfully close to being able to both touch one segment of the commutator at the same time. This would create a short across the commutator and would lead to sparks, fire and smoke just as I was seeing. My guess was that over time the brushes had worn down and developed longer wings.
When new the brushes probably sit square onto the commutator but as they wear down the angle they make to the commutator changes so that you end up with a long wing on one side. Once this wing becomes long enough I think it can just about reach across the gap in the commutator to create a short.
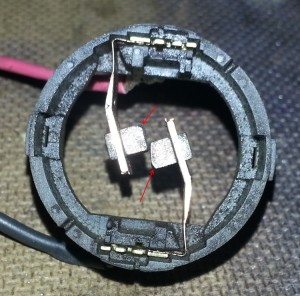
To correct this I carefully sanded away the wings of the brushes. Brushes are graphite so they are really quite soft, use a 180 grit paper an almost no pressure. After a little careful work I was left with brushes as shown to the right.
I did a better job on the top one that the bottom one but I think the shoud wear in fairly quickly in use. While I was inside the motor I thought I might as well make sure that everything was clean and new.
I gave the commutator a quick rub over with some 400 grit wet and dry. It was fairly badly gunked up probably because I’d used the drill a little while it was shooting out flame. I also cleaned in between the commutator sections with a scalple just to make sure there wasn’t anything in there causing a short.
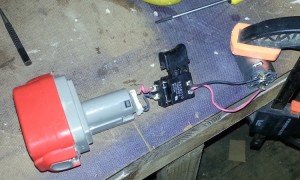
With all that done it was time to put things back together and test the motor. The back plate of the motor just slipped back into place and the motor turned smoothly by hand. I quickly soldered the power cables back on and connected up a battery.
A little pull of the trigger and bingo everything is working fine again. I honestly don’t know how long this repair will last. The brushes are, I think, at the end of their useful life. Once they wear down again I think they will again cause a short which will probably be terminal but there’s maybe six months life in the drill. I tried to solder the back plate onto the motor but I don’t think the joints are holding very well. It’s such a tight fit though I think it’ll hold in place on it’s own.
Getting the case back together was awkward. It turns out the motor has to be exactly rotated correctly for the case to close. I’ve run the drill for a short while since getting it back together and so far so good. There is a little bit of a burning smell occasionally but I think that’s because the sanded brushes aren’t seated in yet so aren’t making fantastic contact.
I’ll be sure to update this page when the drill dies for good as I’m interested to see how much life I get out of something that most people would throw in the bin.

