In the previous part I built a dolly system for moving the scaffolding around and fitted clips to the ends of the working platform to stop it sliding out. In this final part of the main series I’ll fit the guardrail system and build a lifting mechanism to get the scaffold up on to the dolly frame.
Unfortunately the battery in the camera I was using ran out while I was filming the guard rail fitting so I’ve not got any photos / footage of that part of the build. The plans show the system I built though so not all is lost and I’ve grabbed some photos from the system in use.
My original guard rail design had it moving up and down with the platform, this was a great idea while I was living in the design world where I didn’t have to lift a 40kg platform above my head. In the real world this system wouldn’t work so I had a re-think. The solution I came up with was to fit another rung right at the top of the legs and have the guard rail bolt onto the top and second from top rails. This way the guard rail can stay in place if and when I move the platform.
In the photo below I’ve already chopped out for the new rung at one end of the scaffold.
It was just after I’d finished chopping out for this rung that I discovered a fatal flaw in my plan. I was working up the scaffold to cut out the notch for the new rung and I’d closed the hatch. Unfortunately for me I’d forgotten to drill a finger hole to allow me to open the hatch again, oops. Luckily I was able to cram my little finger into one of the holes I’d drilled for starting the jigsaw cut which was just enough to get the hatch started. Only a little skin was lost from my finger in the process and a hole was quickly drilled in the hatch.
Safely down from the scaffold I then cut my new rung to length and screwed and glued it into place then repeated the process at the other end.
The guard rail system is quite simple. It comprises four 50x50mm uprights bolted to the top two rungs with strips of timber bolted around the top to stop you from falling off the scaffold.
While the guard rails might not comprise many parts they do have to be made accurately because they are designed to be interchangeable on each corner and adjustable vertically. I started by rough cutting four pieces of 50x50mm PAR stock and then gang cutting them to exactly the same length.
Now mark exactly every 150mm up the legs from the bottom. As with the cutting do all the pieces at the same time while they are still in the clamps. Use a square to ensure the marks are in the same place on every leg. I chose 150mm spacings because the hole spacing on the rungs will be 300mm. For more adjustability you could space the holes in the legs at 100mm but I don’t think you’d need that level of fine control.
Take the legs to the drill press and carefully drill though each leg at each mark. I used 10mm bolts to hold the legs to the tower as that was what I had on the rest of the scaffold and so I drilled 10mm holes. This was good because it was tight and held onto the bolts but it was bad because it was tight and held onto the bolts. I think if I did it again I’d make the holes a little loose so that the guard rail was easier to adjust.
Additionally at the top of the legs you want to drill one hole to attach a short rail piece and two holes perpendicular to the mounting holes to hold a long rail pieces. These holes should be for smaller bolts, 6mm is a good choice.
With the legs finished it’s time to drill the mounting holes in the scaffold rungs. The holes have to be exactly 300mm apart and the best way to make sure that’s the case is to make a drilling jig. This is nothing more than a block of wood with appropriately sized holes but it’s important it’s made accurately to fit the holes in the legs – I suggest using the legs as a template.
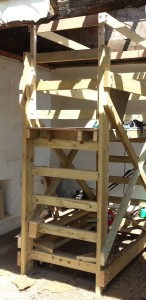
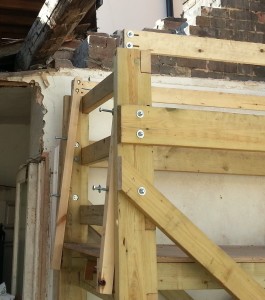
At this point my camera ran out but I’ve put together some photos from when the scaffold was in use that show the finished guard rail system.
In the above photo you can see the guard rail in place and the demolition partially complete. I’ve got the platform down one rung from the normal working height and guard rails are down two holes from their full height putting the rail at about 1m above the platform. I was working right up in the low point of the pitch here which is why everything was set lower than usual.
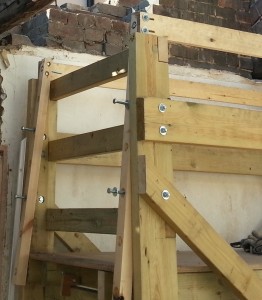
The next photo shows the guard rail system partially removed but note the adjustment holes up the legs which allow it to be moved up and down as needed.
Another couple of shots of the guard rail partially removed – if you are wondering this is how I stored the scaffold at night and I took photos at the end of the work day. The first photo shows the elongated grooves in the long guard rails. Initially I did this just to make fitting easier but it turned out to be a great advantage. Not only did it mean I could store the scaffold as shown in the photo but it also meant that when I was working in the pitch of the roof I could lower one end of the guard rail while leaving the other at the full height.
With the guard rail system complete the only thing left to do was figure out some way to lift the scaffold a few centimetres so that I could get it up on to it’s dolly wheels. I tried a few different designs out before I settled on the one I show here. All the designs had drawbacks and this one seemed like the least worst option.
As with the dolly wheels I had the constraint that it had to fit within the footprint of the scaffold legs which discounted using a lever from the outside. Ideally I also wanted it to be a one man solution which also pretty much discounted levers – don’t forget I’ve got to get the chocks inserted once the scaffold is raised.
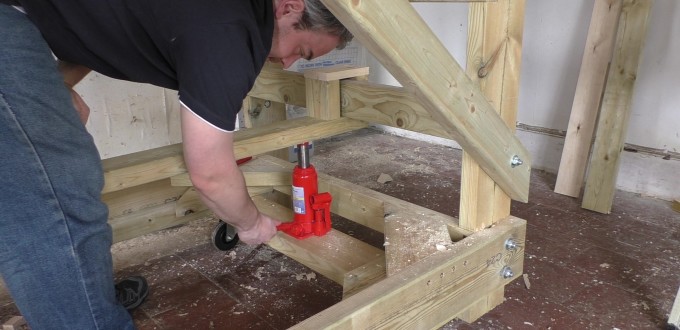
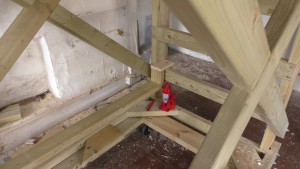
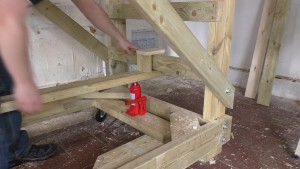
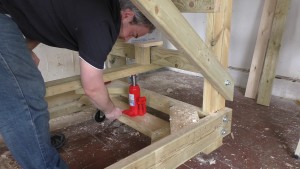
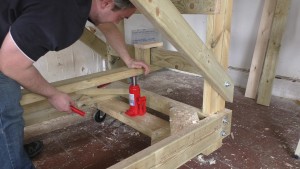
The finial solution was to place a captive, movable beam under the second rung and then use a 5 ton jack placed on the dolly frame to jack up the scaffold enough to insert the chocks.
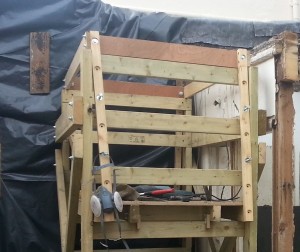
I suppose what I didn’t like about this solution most was the captive beam. I cut it a fraction too short so it kept jamming as I slid it to one side out of the way. If I’d cut it longer I think I’d have liked it more. As can be seen from the photo below the jack could easily raise the scaffold high enough for the chocks and as it was on the short end there was no danger of it tipping over.
One moment of good thinking was to make the timber that captures the lifting beam a little taller than was needed. What this does is allow you to press down on the lifting beam once the scaffold is resting on the chocks to release the jack.
So that’s the build complete. If you liked this build please leave a comment below, I’m especially interested if you try and make one of your own. I really enjoyed this build and I can’t wait to try building another large project.
