If you have been following this build you’ll know that I’m new to engineering so this may or may not be the best way to go about the task of fitting a bracket but what I can say is that it works. Since all the brackets are the same size and have the same hole pattern it might be possible to build a jig for the task. I wasn’t comfortable with doing this though due to the slight variability in bracket sizes and the distance from the corner to the top right hole (see previous article for more details, essentially if the top right hole was in the wrong place the hole pattern would still be the same but everything would be offset).
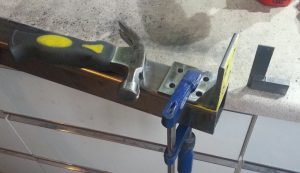
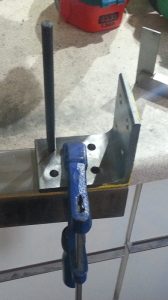
The first step is to transfer the position of the holes in the bracket onto the piece of steel that will be threaded. You’ll need a clamp, a small hammer, a transfer punch and a straight edge such as a square.
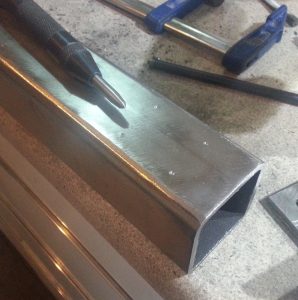
Once the bracket is lined up insert a transfer punch and gently transfer the holes. I say gently because even when the bracket is firmly clamped down it’s easy to knock it a fraction out of place. Once all four holes are done take the bracket off and you should have some some faint punch marks in your steel. Improve the marks by punching again with an (automatic) centre punch. The deeper punch marks from this second punching make centring the drill easier.Roughly align the bracket with the end of the steel and then clamp it firmly down. Use the hammer to gently tap the steel into exactly the desired position using the straight edge to check that everything is lined up. My aim was to get the edge of the bracket exactly lined up with the cut end of the steel. As an aside you can pick up a little hammer like mine at B&Q for a pound. The wife bought it as a joke but it’s proven surprisingly useful.
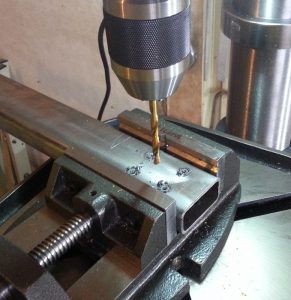
Drilling is then carried out as a two step process.
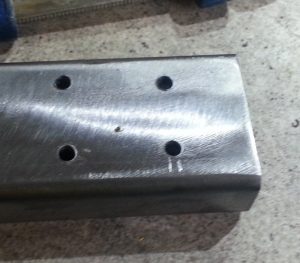
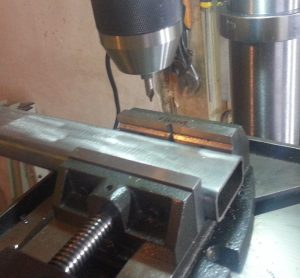
First centre drill the holes then follow up with the main drill. I used a 2mm centre drill with plenty of lubrication. I took the holes down to the point where the drill began to chatter slightly which gave me a bit of a cone for the main drill to align with. I don’t know if this is the correct way to do this but I oiled the table and the bottom of the vice and let the centre drill find it’s own centre in the punch mark. As long as the piece is free to move around on the table this gives a very accurate way of ensuring the hole is in the correct position.
In my test pieces I discovered that clamping the piece down in the “correct” position by eye was a recipe for breaking a centre drill. I’m assuming that the problem is that you don’t get the piece in exactly the correct position so as the centre drill enters the steel it experiences wildly different forces on opposite sides – one side is hitting the raised edge of the punch mark and taking a big cut the other is floating in open air and taking almost no cut. This will bend the tip of the centre drill and snap it off in your work which is a real pain to fix if it’s fixable at all.
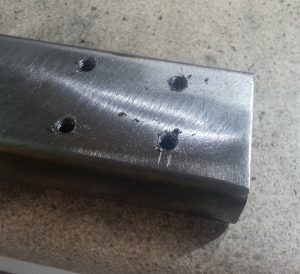
To save on the switching drill bits all the time for the bed bars I centre drilled all four holes on a piece of steel before switching to the 5mm drill bit to make the final hole. The 5mm drill bit was allowed to self centre just like the centre drill. This isn’t quite as accurate as centre drilling and then switching to the 5mm bit but it’s good enough and much quicker. Once complete you should have four 5mm holes in your piece of steel. Notice that my hole pattern isn’t square, I fluffed it with the position of the final hole in the brackets, while not ideal it’s the same everywhere so it doesn’t harm the interchangeability of the brackets.
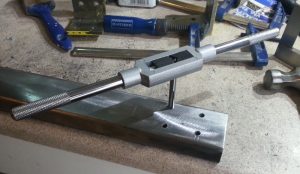
Next tap and clean up all the holes.
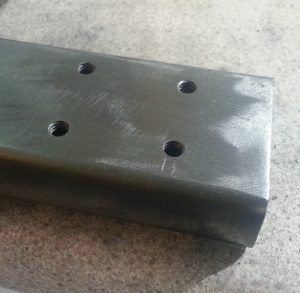
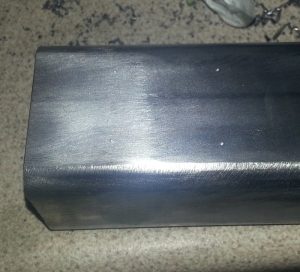
Once all four holes are tapped you’ll have a nice clean thread but some raised metal around the edges. Both the drilling and the tapping will raise a little burr which can be a bit of a problem when fitting the bracket as it can cause a misalignment or a false clamping – sometime after clamping the burr can flatten making the bracket loose. Hit the top of each hole with a flap wheel and the then run the tap through the thread again to remove any sanding junk that gets in the threads. Alternatively if you have a compressor a little blast of air will clean the threads and be a lot quicker.Learning to tap holes was something that really excited me about this project as it felt like real engineering as it’s not something generally done in woodwork. The first hole was fun as was the second, in fact there was still some enjoyment on the 10th and 20th by the hundredth hole though the enjoyment was starting to wear a little thin! Anyway, to successfully tap a hole just take it steady, use lots of lubrication and keep the tap vertical at the start. With thin walled steel like this it’s enough to make it vertical by eye if you see a problem in the first turn or two after the tap bites you can usually correct it. Once the tap is properly started though trying to correct a non-vertical hole will result in the tap snapping. Remember to reverse the tap every half to full turn to break the chips or, you guessed it, you risk breaking the tap.
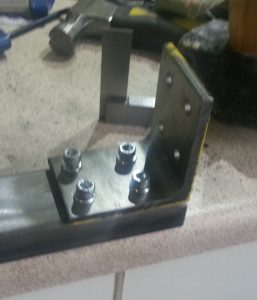
Finally fit the bracket and label it.
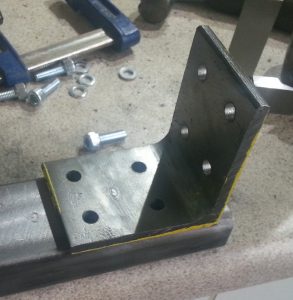
I’ve tested whether brackets are interchangeable and as far as I can tell they are – I wasn’t about test every bracket everywhere but the sample I tested all worked fine. Even so I’ve taken to stamping each bracket and piece of steel with it’s own code so that should I take the machine to pieces I can put it back together again in the same way. I’m not sure how well these marks will show up through the final paint job but it’s the best I can do.Quickly fit the bracket to the steel using all four holes. This will let you know if there are any obvious problems sooner rather than later. Make sure you use all four holes as one misaligned hole could easily make a bracket not fit. You can gauge your accuracy here by noting how much play you have in the bracket when the bolts are just loose. If you are fitting M6 bolts and the brackets are drilled at 7mm you should have about 1mm of play in the bracket, my worst bracket had an estimated 0.7mm of play.
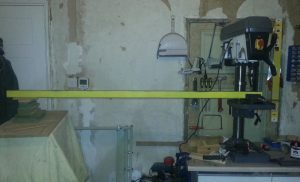
And finally… for drilling very long pieces you have two choices. Either drill them by hand or quickly knock up a stand like the one shown here to support the piece while drilling. I prefer to support the piece and use the pillar drill as it gives better results even if it is a bit of a palaver.

